Photo: The Pool at Night

The Pool at Night — light and reflections near the bright house

This is what the pool looks like… at night. Got up at 4 A.M. to shoot this during my vacation; I set the camera on the edge near the pool, dialed in a 30-second exposure, set the timer, and then waited. There were some lights on in the house on the left, which gave nice light. You can see the trees are blurred from the wind, as is the water in the pool. Ready for a swim?

Canon Rebel XTi, EFS 18-55mm, 30″, F3.5, 18mm, ISO800, 2008-06-29T03:50:44-04, 20080629-075044rxt

Download the high-res JPEG or download the source image.

This work is licensed under a Creative Commons Attribution 3.0 License. Please credit me as “Photo by Richard Thripp” or something similar.

Photo: The Dead Auditorium

The Dead Auditorium — empty red chairs in a dark theater

I shot this after my cousin’s dance recital, once everyone left. It was quite dark, so I pushed it to ISO800 and went down to F1.6, taking the opportunity to use a shallow depth of field. The theater is a dead one if I’ve seen one, in this picture at least. I like the colors of the chairs, and the lighting was nice and indirect, despite the dimness.

What did I do to this? First, I cloned out the open door in the background, which was a big, white, ugly distraction. I couldn’t get the wall to look right; it looked fake and too smooth. I didn’t want to deal with it, so I just pumped up the contrast till the background went to black. An effective solution in a pinch, and it adds to the mood of… deadness. Finally, I made the colors less yellow and burned in the corners (vignetting).

Canon Rebel XTi, EF 50mm 1:1.4, 1/60, F1.6, 50mm, ISO800, 2008-06-22T00:52:14-04, 20080622-005214rxt

Download the high-res JPEG or download the source image.

This work is licensed under a Creative Commons Attribution 3.0 License. Please credit me as “Photo by Richard Thripp” or something similar.

Torrential Rain

After weeks of threatening skies that produced nothing, we’re finally getting some rain in Daytona Beach, Florida (Ormond Beach actually, but they’re close). I was drenched on the way to school yesterday, and we just had quite a cloudburst at my house. Here are two photos:

One thing that you’ll find when it’s raining a lot… is that it’s hard to get a good picture! First, it’s very dark out, so motion blur becomes a big problem. Second, you’ll take lots of photos where it looks like nothing is happening! (I always do.) Just a bit of fog or a gloomy sky, instead of the big raindrops and howling winds that your eyes see.

You can only really show the wind with a motion blur shot of trees, or if there’s a tornado or tons of mist flying about. You get photos with no rain because it takes a fast shutter speed to show it, which you can’t use in the dark normally (try upping the ISO sensitivity and using a smaller f number). But I have some other tips to capture the mood:

• Over-ride the auto-metering by stopping down a bit. When you want a dark scene, the camera doesn’t know and will make everything look bright and cheery. You have to fix that yourself.

• Show puddles, big puddles. Or the raindrops hitting those puddles. Use as fast a shutter speed you can, or a slow one showing the blur of turbulent water.

• Get a shot of raindrops falling. This works best if it’s still raining and the sun has come out, because there’s plenty of light and you can easily use a fast shutter speed, like 1/2000 of a second.

• Show raindrops on a window with a dark sky behind it, from inside your house or in the car.

• Stake out a spot and take shots of cars kicking up water, like my shot, Make Waves.

• Take shots before the rain starts, like I did with The Red-Brick House. Often, the sky is beautiful and ominous, but after the rain starts falling, it turns to a boring gray mush.

• Get closer. Even if it’s blurry, snap photos of rain sweeping off roofs or draining from gutters. You’ll capture the experience of torrential rain much better than just pointing your camera into the sky.

• When it’s blue and rainy out, your camera will “fix” this by making it look a normal, warm gray. Over-ride the white balance by using the “sunny” setting (not cloudy, as that’s too warm). You’ll get more interesting, unsettling blue tones, without them being excessive.

• Protect your camera! Put a plastic bag over it, then cut a hole for the lens if you need to. If you’re particularly wealthy, you can even buy a camera rain cover (there are lots of options).

• Go to the river or ocean and take shots of all the rain hitting the blue water, or the haze off in the distance. Watch out for lightning, though.

• If you’re going to photograph lightning, set up a tripod under a roof somewhere, shooting with a thirty second exposure. You’ll need to close down the aperture as far as you can, perhaps even using a filter to keep the light under control during the lengthy exposure. Don’t trust your camera; under-expose your photos. If any lightning does turn up, the camera won’t be expecting it, so the shot will turn into an over-exposed blob if you’re listening to the meter.

Now you know what to do. Just wait for some rain, and get out there.

Photo: Color and Light

Color and Light — the morning sun shines on refrigerator magnets

These are magnets that are holding up 4*6 copies of my photos on the refrigerator. The sun shines through the window in the morning, lighting them up like this. I didn’t notice it before (not usually up in the mornings), but I had to snap this when I saw it.

I toned down the blue channel while adding to the red channel, and darkened a bit.

Canon Rebel XTi, EFS 18-55mm, 1/50, F5.6, 55mm, ISO400, 2008-05-30T07:39:13-04, 20080530-113913rxt

Download the high-res JPEG or download the source image.

This work is licensed under a Creative Commons Attribution 3.0 License. Please credit me as “Photo by Richard Thripp” or something similar.

Photo: The Abandoned Baseball

The Abandoned Baseball — the game is over, and the ball forgotten

The game is over, and the ball, forgotten. I found this on the ground outside the baseball field at the park. I moved it to where the grass was more brown (no one waters it), laid in the dirt, and shot this. I used a really large aperture — F1.6, so just the front of the baseball would be in focus, but nothing else, so the subject would seem singled out. I couldn’t even go down to F1.4, because I was maxing out with a 1/4000 second shutter speed.

Fun editing here. I cloned out the sky in the back, added contrast, and darkened a lot, for a (you guessed it) dark look. Before doing this, I used highlight recovery in Adobe Camera RAW, and burned in the highlight on the ball. It was a bit over-exposed, but only a little detail is lost.

Canon Rebel XTi, EF 50mm 1:1.4, 1/4000, F1.6, 50mm, ISO100, 2008-06-05T16:08:38-04, 20080605-200838rxt

Download the high-res JPEG or download the source image.

This work is licensed under a Creative Commons Attribution 3.0 License. Please credit me as “Photo by Richard Thripp” or something similar.

Photo: Blue Marbles

Blue Marbles — shiny spheres in a line

The definitive photo of blue marbles. These marbles are my grandmother’s, and the yellow table I arranged them on is on her veranda. I get to take creative shots of them like this, of course. :grin: The evening light was just right, and while I originally intended to focus on the first marble, having the focus on the second is more nonconforming and gives a sense of depth. I went back into Photoshop today to revamp this February 2006 piece; my editing skills have improved, so I’m finding the above version especially likable.

I added contrast, removed color, and darkened the edges. Unfortunately the blues clip where the light is shining through the marbles, but I toned the colors down anyway, since subtlety is better than garishness, and because the brighter colors look bad in print. There was some dirt on the marbles and table I had to clone out, as always, but I left some on the table so it doesn’t look overly perfect. The finishing touches were to desaturate the yellow hues slightly, and to sharpen and brighten the second marble while blurring the rest of the image. The camera I was using at the time (a Fujifilm FinePix A360) would only focus to 2.4 inches; I got too close so the first one is blurry. I’m liking the depth of field in retrospect, as it seems like the natural choice with the further emphasis of the second marble.
[quickshop:4*6 Blue Marbles (lustre):price:0.95:shipping:0.45:shipping2:0.45:end]

Buy a 4*6 copy for $0.95 (USA only). Lustre finish. After adding, go to your shopping cart.

Fujifilm FinePix A360, 1/63, F2.8, 5.8mm, ISO64, 2006-02-22T17:49:43-05, 2006-02-22_17h49m43

Download the high-res JPEG or download the source image.

This work is licensed under a Creative Commons Attribution 3.0 License. Please credit me as “Photo by Richard Thripp” or something similar.

More of the Blue Marbles series.

Photo: Illumination

Illumination — a scary face lit up on black

My self portrait. Where there’s light, there’s darkness, and that darkness, surrounds me. I lit this with a bunch of cheap flashlights, using my camera’s timer. This is how I look after journeying into The Night of Eternal and Unrelenting Darkness. They’re really the same photo, if you look closely.

I removed blemishes, darkened a lot and added contrast, burned the edges of my face to make it more round, re-centered my face in the bottom-right third, and finally converted to black and white, with a bit of blue. The XY coordinate (512,332) in the above is RGB (18,16,21) now, where it should be (17,17,17) for black and white, for example. This adds subtle coldness, which is the best type, anyway.
[quickshop:4*6 Illumination (lustre):price:0.95:shipping:0.45:shipping2:0.45:end]

Buy a 4*6 copy for $0.95 (USA only). Lustre finish. After adding, go to your shopping cart.

Canon PowerShot A620, 1/15, F2.8, 7.3mm, ISO50, 2007-01-29T17:19:17-05, 2007-01-29_22h19m14

Download the high-res JPEG or download the source image.

This work is licensed under a Creative Commons Attribution 3.0 License. Please credit me as “Photo by Richard Thripp” or something similar.

Photo: Speed

Speed — speeding down a city road at night

This is the second-anniversary edition of Speed, a photo I took from the passenger’s seat of a car in motion. We were moving at 30 miles per hour, but with the one-second exposure, the center is sharp but the edges are blurred. While I posted this on deviantART back in May 2006, I’ve added nice orange text, a border, and a bit more contrast to this revised version. The street is Derbyshire Road in Daytona Beach, Florida.

The Call, an English band, put this photo on the cover of their album, Missing Pieces, from October 2007. I enjoy the songs, and though the band broke up last month (April 2008), they will be forever missed.

The photo-shoot for Speed

As you can see above, I took eight photos to get this one. All the others were blurry (camera shake), but I got the highlighted one just right by bracing the camera against the dashboard, and so it became Speed.

Fujifilm FinePix A360, 1″, F2.81, 5.8mm, ISO100, 2006-05-12T20:33:44-04, 2006-05-12_20h33m44

Download the high-res JPEG or download the source image.

This work is licensed under a Creative Commons Attribution 3.0 License. Please credit me as “Photo by Richard Thripp” or something similar.

Photo: The Stuccoed House

The Stuccoed House — a lit, yellow home at night, with three ghosts

A thirty-second exposure of my house at night, with the lights on. Our house has creatively applied stucco that is painted yellow, so it makes an interesting and reflective texture, particularly with the yellowish indoor lights. The ghostly figures are of me standing next to two windows and in the light behind the house; I stood still in each spot for eight seconds to achieve the effect (took four tries). I don’t own a proper tripod, so I used a step-ladder; it does well in a pinch.

For the glowing effect, I used a gaussian-blurred layer with soft-light blending in Adobe Photoshop CS3. Other than that, I added contrast and color, burned the sky, and dodged the ghosts.
[quickshop:4*6 The Stuccoed House (lustre):price:0.95:shipping:0.45:shipping2:0.45:end]

Buy a 4*6 copy for $0.95 (USA only). Lustre finish. After adding, go to your shopping cart.

Canon Rebel XTi, EFS 18-55mm, 30″, F3.5, 18mm, ISO400, 2008-03-22T22:11:14-04, 20080323-021114rxt

Download the high-res JPEG or download the source image.

This work is licensed under a Creative Commons Attribution 3.0 License. Please credit me as “Photo by Richard Thripp” or something similar.

Low-Light Photography on your Digital Compact

Low Light — Photo by Richard X. Thripp

Peter Rise has an interesting question for me:

“When you’re doing action photos, do you use the viewfinder, or an LCD display that you can look at from a distance? What are the advantages/disadvantages for each?

I ask because I’ve been *attempting to* take school basketball pictures lately, which I find extremely difficult. Much more difficult than football or wrestling photos, because basketball is much faster-paced. The ball typically switches players within 1-2 seconds, and by the time I find a good photo, they’re on the opposite side of the court. If you could think of any advice that might be helpful, I’d really appreciate it.”

I use the viewfinder, but I have a digital SLR, where you can’t use the LCD screen anyway. On my smaller Canon PowerShot A620, I have both, but I generally use the LCD, to avoid the parallax error, which is quite bad on my camera, even at far distances. If you notice the LCD screen lagging in low light, the viewfinder is better.

Of course, there is then the issue that point-and-shoot cameras don’t operate well without a flash indoors (even if it’s fairly bright). Have you ever noticed at the basketball game, or any indoor performances, that people from 40 feet away have their flashes flashing away? The flash will do no good at that distance, and they’ll get grainy, under-exposed shots and be disappointed. This is due to two problems: one, they have their cameras set to an automatic mode, and the camera does what it thinks is best, which is in this case, horribly wrong (no flash is the only way to go beyond about ten feet). Two: compact cameras have small sensors that do a poor job at gathering light compared to SLRs. I struggled with this problem for two years before getting a Canon Rebel XTi last August, and found the following options:

1. Use the largest aperture setting (lowest F number), though this won’t be enough alone.
2. Increase your camera’s light sensitivity (ISO speed), though this produces grainier photos (digital noise).
3. Use a tripod, hold really still, or brace the camera against a hard surface such as a chair, table, or wall. Get your subjects to hold still too, though this is not an option at a basketball game, of course.
4. If you can’t do 3, use image stabilization, though you’re out of luck if your camera lacks the feature.
5. Go into manual mode and use a faster shutter speed, deliberately under-exposing your photos, and then brightening them on the computer afterwards. This is a bad option, as it lowers the quality your photos’ quality on many levels: shadow detail is lost; posterization and JPEG compression artifacts become noticeable. It won’t be so bad if you use RAW mode, but if your camera offers RAW mode, it’s probably high-end anyway, and you won’t need this kludge.
6. Take three or four photos where you normally would’ve taken one. You’re likely to get one sharp photo, even with a 1/20 shutter speed.
7. Zoom out all the way, because zooming in magnifies camera shake resulting in photos that are more blurry.

Use 1, 2, 3, 6, and 4 (image stabilization) if you have it (but not on a tripod), and you’ll have a winning combination. 7 works if you have to balance the camera yourself, but you’ll include a lot of clutter and barrel distortion may become noticeable.

For the technical details, use “Sports” mode, or if you have an Aperture Priority mode on your camera, switch to it, raise the ISO speed up to 400, and change the F number to the lowest setting (2.8 on my Canon PowerShot). If the photos are still blurry, raise the ISO speed to 800 (if available), or use a tripod or equivalent.

Even after doing all this, you’ll still have the problem of shutter lag. You press the button, and then 2 seconds later, after automagically choosing focus, aperture, shutter speed, white balance, and the flash to use, the camera takes a photo of the empty side of the court. The biggest thing you can do to combat this is to have the camera make these settings in advance, and this is accomplished in almost every camera by pressing the shutter button down half-way, holding it, and then finally pressing it down all the way at the right moment. Keep in mind that your locking in the settings with the half-click, so if you do it on the dimly lit edges of the court and then move to the bright center, you’ll get a photo that’s too bright, and moving close-to-far or vice-versa will merit an out-of-focus image.

If it’s really dark, you’ll have to manually focus the camera. Many compacts don’t offer this, so try locking the settings with a half-click, pointing toward a bright object that is as far away as your darker subject.

If you’re looking for a camera for ambient-light photography, but don’t want to invest in a good digital SLR ($450 for the Canon Rebel XT on Amazon.com), the Panasonic Lumix DMC-LZ6S ($120) and Fujifilm FinePix F40fd ($184) are getting good reviews.

If you are going to be using the flash, 7 Strategies for Avoiding Flash Blow Out at Digital Photography School complements this article.

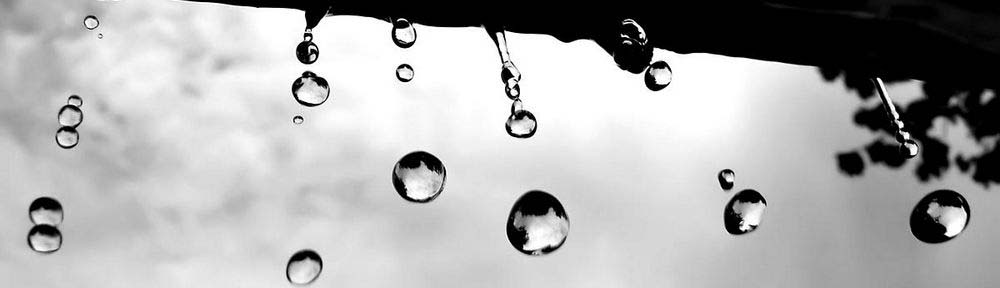
I took the photo at the top in a dimly lit theater, with a Fujifilm FinePix A360 digital compact (more photos) in auto mode with the flash off. 1/2 shutter speed, ISO250; had to brace the camera on the seat in front of me.

Keywords: low light, ambient light, lighting, dark, indoors, basketball court, flashless photography on the cheap, sensors, iso speed, shutter lag, how-to, suggestions, digital compacts, digital point-and-shoot cameras, p&s, a beginner’s guide