This is a lengthy post (~4500 words). I cover file names in great detail, but go much further into the differences between a literal and abstract asset management system (descriptive file names vs. not), spend many paragraphs debunking time zones, daylight time, traditional date formatting, and use 500 words to debate underscores vs. hyphens vs. spaces to break up words in your web addresses. The implications go way beyond mere file names. Read on if you’re in for a adventure . . .
I don’t like that all the articles I read on organizing your photos recommend giving them descriptive file names. The problem with files and directories is that they’re just like their non-computerized equivalents: rigid and inflexible. Your photo cannot appear under “flowers” and “macros,” because a file can only belong to one folder. Similarly, it can only have one file name, and if you fill that with keywords so you can use the Windows search to find it, the name becomes long and unwieldy. Plus, if you take a lot of photos (I’m averaging 500 a month), it’s totally impractical.
Why is it impractical? Because you’re restricted in length and taxonomy, there are no connections between files besides rigid folders and rudimentary keyword searches, and you’re adding metadata in a bad place, because the file name should be the unique and persistent identifier for the image. If you want to change all your pictures of “cars” to “automobiles,” you’re in trouble. Every time your taxonomy scheme changes, you have to change dozens of file names. This is fine if you’re the average, uninformed user: you have one copy of each photo in “My Pictures” on your hard drive, and that’s all that exists. But even then, unless you’re use batch renaming software like 1-4a rename (the biggest kludge ever), it’s still tedious to change your terminology. If you’re an informed, smarter user, you’re backing your photos up to the closest thing we have to an archival media: recordable CDs or DVDs. And then, you have to deal with all sorts of tracking issues when you change your file names, because the names of the files on the discs you’ve already burned are etched in stone.
The ideal file name provides no information whatsoever about it’s content. I’m all for ideals, but this is just impractical. No info about the file is like DSCF0001.jpg. A serial number, sort of. But really, what we need to use is some constant, timeless fact about the photo. The date and time. If you’ve set your camera properly, it’s recorded in the Exif metadata of each file (or for RAW, somewhere like it), so we can just pull it out and use it as the file name. But first, the other options . . .
Maybe you think you can be smart—you’ll just combine it all to get the best of both worlds. Create folders by date, make the start of the file name the date. Then, give a whole bunch of info about the file after that. Perhaps you’ll even pioneer a controlled vocabulary system so you have a taxonomy you feel you can stick with for the next few decades. I love this page: File Naming Conventions for Digitally-stored Images. It’s a classic example of this newbie mindset: that you can control everything within the Draconian structure of the file name, enumerate all the important details, pick a syntax to stand the test of time, fit it all in 64 characters, and apply the same processes to the hundreds of photos you’ll be taking every month. With this gauntlet, you could become a librarian and fill eight-hour work days, because there’s no end to the battle. As soon as you take a photo, five minutes of administrative decisions for your “catalog” come into play. And you don’t have a “catalog,” because if you had one, you wouldn’t be using file names.
For pre-computer libraries, we had card catalogs. We can’t move books about on a shelf like we can records in a computer database, so it makes sense to have the metadata stored separate from the items being cataloged. Film photographers devised similar (though hopefully less complex) methods to track their negatives. With a card catalog, if you want to add a new subject, you create new records for all the items under that subject, even though they already have other records (cards). If an author has a pseudonym, he gets a separate card. Card catalogs waste space, are redundant, hard to use, and torturous to update. Using file names to organize your photos is no different.
One principle that I hold, is that it is easier to have one way to do things, than several divergent methods. The same applies to organizing your photos, and I suggest you simplify your life by doing the same everywhere.
What are these things? First, write the date as YYYY-MM-DD, always padded with zeroes if needed, and never omitting the century. The time is HH:MM:SS with a 24-hour clock, always padded with zeroes. When written together, separate the date and time with the letter “T”. So the time now is 2008-06-08T18:30:22. This is ISO 8601 date formatting, and it will serve you well for all your papers and computerized files. The reasons: first, it’s unambiguous across regions. In the U.S.A. we often do MM-DD-YY (completely senseless), and in the U.K. it’s DD-MM-YY (better, but still senseless). When you put the date in descending order, with the full year, everyone understands it. No one’s going to think it’s YYYY-DD-MM… because that would be stupid.
Also, we have this crazy predilection for dividing the day into two halves, one “A.M.,” and the second, “P.M.,” which stands for something in Latin. I don’t even want to know how this came about. It’s just pointless. Don’t even think of naming your files with that format. They won’t even sort properly. The correct form of the date (descending order, each field padded with zeroes), sorts chronologically in even the oldest, simplest computer systems, because they’re all based on lexicographical order.
Next, give up time zones. Even if we’re looking just at your file names, why would you use a time zone? What are you going to do when you begin your great photographic adventure, crossing time zones left and right? Are you going to change your camera’s clock each time? What happens when you get home, and you want to show a chronological slideshow of your journey to your family? But then, you have photos you snapped at 3:30, and then you have photos that you snapped at 3:00, but really they were snapped a half-hour later than the ones from 3:30, because you crossed into a new time zone. Do you want to have to work out that mess every time you travel the world?
“But Richard,” you might say. “Why can’t I just use my home time zone all the time, and put that in my file name?” Sure, you can do that. But then you’re holding an arbitrary time zone while in another, arbitrary time zone. What if you live in California, but you vacation to Florida, keeping your California time zone on your camera? Then a year later you move to Florida, and switch the time zone for all photos from then on. Then you go back to California to visit your family, but now, you’re keeping the Florida time zone. Then 50 years later your grandkids are trying to decipher the mess you’ve left them. Or ten years later, you want the exact time you shot a photo, but you can’t even remember.
Even worse than time zones, is Daylight Saving Time. Just looking back in Florida (my state). In 2006, it started in April and ended in October. In 2007, it was changed to start three weeks earlier and end one week later. In 1974, it started on January 6. And try to figure out the rules in any other state or city, and you’re in for headache. In Indiana, there is no daylight time till 2006, and now they’re on board with us. Some cities followed daylight time before, though. Daylight time isn’t enough; many counties and even half the state have switched back and forth between Eastern and Central time. There’s a whole article on Wikipedia about it: Time in Indiana. Can you tell me they’d need that if they followed rational time all the time (UTC)? We even have a year 2007 problem due to the U.S.A.’s recent changes to daylight time. I don’t remember where my government got the power to declare to me what time it is.
This is a mess, a terrible mess. It’s so bad, the Zoneinfo database defines rules by city, because it can’t even assume the rules will be consistent across a particular region. Reading the Wikipedia entry… “The database attempts to record historical time zones and all civil changes since 1970, the Unix time epoch.” It attempts? We aren’t even daring enough to claim that it has all the rules for the past 38 years? In 2050, maybe we will be attempting to remember all the rules going back to 2012? Do you really want to be poisoning your photos’ metadata with this nonsense?
Daylight time can even kill you. This report, titled FDA Preliminary Public Health Notification: Unpredictable Events in Medical Equipment due to New Daylight Saving Time Change, warns about the changes to daylight time that began in the U.S.A. in 2007:
If a medical device or medical device network is adversely affected by the new DST date changes, a patient treatment or diagnostic result could be:
* incorrectly prescribed
* provided at the wrong time
* missed
* given more than once
* given for longer or shorter durations than intended
* incorrectly recorded
A treatment could be missed or given more than once? And we’re doing all this to “save” energy? In reality, it leeches from everyone. Computers, DVRs, VCRs, and countless other devices need to be needlessly complex to accommodate these idiotic rules. People have to change clocks—dozens of them—twice a year (everything has a clock now). And I’m sure the missed appointments number into the thousands. It messes up all e-commerce systems too. All the sudden you have one hour that’s skipped in the spring (2 to 3 A.M.), or duplicated in the winter (2 to 1 A.M.). You don’t have accurate statistics for that day or hour, and any order tracking software that’s worth its salt has to include extra code to work with the phenomenon without exploding.
The entire concept of time-zoning is evil and pointless. Daylight Saving Time is even worse. We must forsake both in a unilateral shift of thought. You can be the catalyst. The beast must be slain. Of course, you can’t give it up for appointments, or at your job (unless you’re a free-thinker and self-employed), because everyone else is using a convoluted system. But like Ghandi said, “Be the change you want to see in the world.” So do it wherever you can.
When you switch to better date formats and smarter time, you’ll fix all sorts of issues on your computer. Now you can just prefix your documents with the date (YYYYMMDD), and they’ll sort in order because the date is in the right order. Same for the time, with the better 24-hour system. I gave up daylight time and local time on 2007-01-01, as my New Year’s resolution. Before that, I’d have lots of issues with file synchronization, because the modern NTFS file system is pretty smart about time zones, and uses UTC all the time just like you’ll be doing. Your time is just an offset from it, and when your computer’s clock switches for daylight time, all the files change (even if they shouldn’t and don’t need to). So then, if you’re backing up to other devices, especially ones using old file systems like USB flash drives, all the time stamps are wrong. You’re synchronization software (I use SyncBackSE) will re-copy all the files thinking they’ve changed, even tens of gigabytes of them. There’s some option to override that in the newer versions, and most other software has hopefully provided for the problem as well. But it doesn’t need to be a problem. If you’d give up the silly notions of changing time that you’ve been brain-washed into by the state, you won’t ever need to deal with this problem again.
You do have to go all the way and give up time zones while you’re at it. My clock says 20:00 right now, but the “real time” is 16:00 here (or 4 P.M. if you’d prefer). If I need to make the adjustment for friends or relatives that are still stuck in their old ways, it’s a snap to do in my head. Then, if my friends use my computer, they get to be confused and ask funny questions like “why would anyone do this?” Before, I’d just say “nevermind, I could never make you understand it.” Now I can, with this article. You can too. Don’t let anyone sway you in your decision to rebel against time zones. Time zones are for average people. They mess up online communication, they hinder commerce, they confuse travelers. “Noon” should be completely arbitrary. It isn’t even when the sun is at the top of the sky now, with the daylight time problem and our expansive time zones. Do you think that with a time zone that’s hundreds of miles wide, that “true” noon is going to be at the same time in all of them? To do that, we’d have to have time zones by the second, that change every few feet. We don’t even have a good system now, so whatever we move to has to be better.
What’s my final recommendation? Switch your camera and computer to Universal Coordinated Time (four hours ahead of North American Eastern Daylight Time). Abandon “logical” file names. There was nothing logical about them after all. Keep the Gregorian calendar. Use the date for your name; don’t go for completely arbitrary names (like DSCF0001). Format it as YYYYMMDD-HHMMSS@#. The number counts from 1 if there are multiple photos in one second (burst shooting). The @ is your initials. Not your name, just two or three letters in case you get your family on board for naming files like this, and you need basic tracking. You can name your photos with their titles, if it’s small scale like for an email or a website. Never do it in your main archive, because you’ll have a lot of photos there and you want consistency. If you’re any sort of photographer, then you will have a lot of photos there. 100 a day perhaps. 20 a day if you’re like me and cull a bit more. It’s still a lot, so you need a good system. Put the files into folders by month, like 200806.
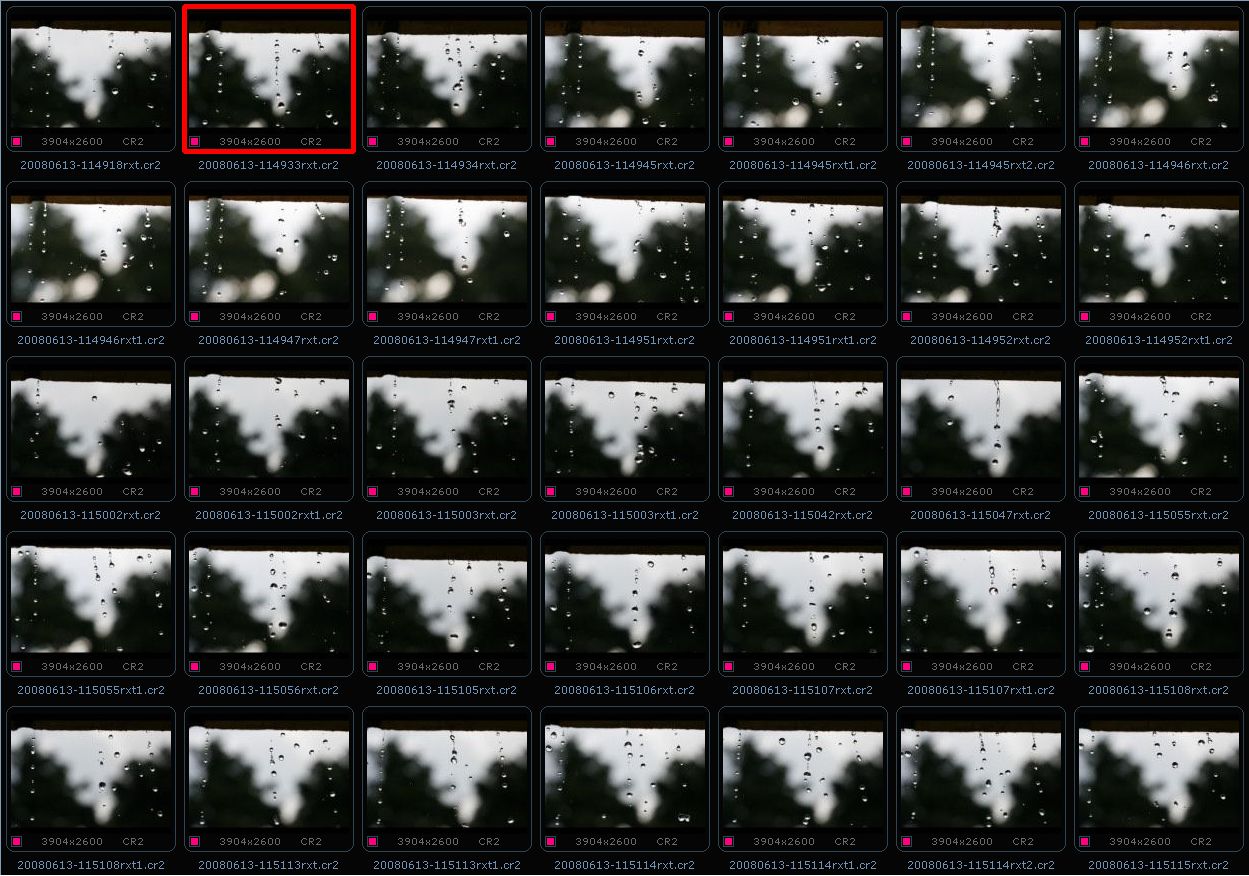
The whole reason to name your files like this, is because it can be easily automated. You can have a computer program apply your file-name format to all your photos as you save them to your computer. I recommend and use Downloader Pro for this, because it’s flexible but not horribly complicated. My file-name string is {Y}{m}{D}-{H}{M}{S}rxt{l} . Then, after downloading and backing up my photos (which Downloader Pro can do too), I delete them from the memory card immediately. Oh, and when I plug in my memory card, the software starts up and copies the photos automatically. Very nice and swift. It’s $30 though.
If you want something free, Digital Image Mover looks good. If I used it, my string would be %Y%M%D-%H%m%Srxt . There’s no counter that only comes into play if there’s a name clash, so if you have two photos in the same second, it won’t work for you. You can use %c, but then you’ll have a number on every file. What I’d do is just rename the problem files on my own, because it doesn’t come up often (unless you burst shoot and don’t do your deletions in-camera). Be sure to check “Use EXIF ‘DateTimeOriginal’ field” and “Verify files after copying” under Options. You should always use Exif time instead of the file time-stamp, which can be seconds later (because it’s from when the camera wrote the file to the memory card, not exactly when it was snapped). Verifying checks the source against the new copy twice. It’s slower, but it’s insurance against corruption.
The third option is to just move your files over in Windows Explorer, and then use IrfanView to rename them. I used to do this. It works well, though you have to do it each time you import your photos. Go into File > Batch Conversion/Rename, and specify a file name like this: $E36867(%Y%m%d-%H%M%S)rxt . Replace “rxt” with a two or three-letter name for yourself. You’ll have to deal with file name collisions in the same second on your own.
Keep in mind that Exif metadata is only a property of JPEG files, not RAW, and you should be shooting in RAW if you have it. I know Downloader Pro gets the date in whatever proprietary format my Canon Rebel XTi formats it to, but I’m not sure about the other programs.
Anyway, it’s important you switch file name schemas now; change gears completely. Whatever you did in the past is past. Gone, zilch, nada. Don’t change old stuff, don’t update, just switch to a smart naming scheme now, because this is something you shouldn’t have to deal with anymore. Same if you’re on board to abandon traditional date formatting and time zones in your daily life. You shouldn’t have to wait until you catalog your photos to being archiving them to discs or sharing them with friends. But that’s what you have to do if you use “reasonable” file names.
Let me make a note here that you should never use spaces or capital letters in your file names. When you post them to the Internet, that causes trouble. URIs aren’t supposed to have spaces; read this for a good discussion of it: spaces in file names. In the UNIX world, which your web server will probably be using a derivative of, all file names are case sensitive. I know, I don’t like it either. But it’s better just to stick to lowercase so if anyone writes down a web address from your website, they don’t get mixed up. Sure, when you need to post your photos online, you could just change the file names. But it’s so much better to get it right to start with.
I remember posting an album to Photobucket to share with friends… and I found that since I’d used capital letters in the album name, it wouldn’t work when you typed it in lowercase. Not at all. Photobucket considers “Photos” and “photos” to be completely different. You can even have both albums and put different photos in them. This is nothing like Microsoft Windows (which is case insensitive except for display), and it’s confusing for everyone. So just stick with lowercase.
For separating words in file names, don’t use spaces ever. Hyphens or underscores are your best bets. I like hyphens, because if you have something like my_photos, and it’s underlined, it shows as my_photos. The underscore looks like a space. And it will be underlined, if it’s a part of a URI on your future website. And it will confuse your readers, because they’ll be sending the URI about by email when your site gets popular… and then someone will write it down on paper to share with a friend… and they’ll use a space instead of your beloved underscore… and then the world will end, because someone won’t be able to look at the photo or article that will change their life, all because you used underscores instead of hyphens in your URIs.
Historically, Google has treated underscores as part of a word, but hyphens as spaces. This meant that if you used underscores, you’d rank much lower in Google searches in general. This changed a year back; read Underscores are now word separators, proclaims Google. But still keep using hyphens, to prevent the issue with underlining. Also, they look nicer and are easier to type (no holding down Shift). You may be asking: why are you talking so much about the Internet, if this is an article about the file names of photos on my computer, which aren’t even on the Internet? The reason is that if you ever post your photos online, the file names will become an issue. It’s always easier to do things one way, as I talked about several paragraphs up. Your computer keyboard doesn’t do things one way, and that is why the Caps and Num lock keys cause so much trouble.
How should you implement your catalog? Definitely not by file name; that’s the lowest form of cataloging. It hardly even deserves to fall under the umbrella term of “digital asset management.” But of course you know that (or are fighting it) if you’ve read this far. Don’t do it directly with IPTC metadata either; that’s barely a step up from file names. Use an abstracted database. Browse your photos in that database. I like IMatch, because it’s scalable, terribly complicated yet still easy to use, and it decouples your photos from your files. Basically, the assumption that you should have the files on the computer to browse them is gone. It was never a good assumption anyway. You can browse your photos by thumbnail and metadata with just the database (~3% the size of the files), and they’re in “offline” mode; but you’ll be fine for copying or manipulating them once you bring them online (i.e. turning on your external hard drive, or inserting the CD the photos are on), and nothing blows up or disappears. You’ll wonder how you got by with the old way, where the photos had to be there to be browsed or cataloged, even if they took up 250GB (like mine are approaching). And of course, photos can be assigned tags, called “categories,” though of the flexible kind. A photo can belong to any number of hierarchal categories, or none at all, or child categories but not parent categories, or anything you can think of, without wasting space. The categories aren’t even like folders, because when you click a high-level one, and it shows its images plus all the images in sub-categories, which is much better than clicking through dozens of folders in Windows Explorer. But of course, you can change this if you want.
IDimager is my second choice, and seems to do all the above. ACDSee is third, though I haven’t used it. If you switch between software, you can export your work by embedding it into the IPTC metadata, and then importing that in another program. IMatch provides a bunch of other methods, and the others probably do, too. The problem with IPTC metadata is that it puts your files out of sync with the backup copies you’re making to CDs or DVDs, because they can’t be updated. I don’t like that. Think of the files as books on a shelf, static and permanent. Your database is your card catalog (on steroids). Using file names or inline metadata is like going to each book on the shelf, and putting a whole bunch of keywords on its spine label. Senseless and impractical. We wouldn’t even try that sort of thing in the stone age.
So, avoid syncing IPTC data with the database, unless you don’t mind your archival copies being out of date. I mind it. I don’t use IPTC, even as a backup; I just backup my database instead.
The three programs I mentioned are all about $60, quite a hefty investment. But less than your camera, and certainly worth it if you value your time. I see people spending more time naming their pictures, than actually taking them, and I don’t want you to fall into that trap. You can easily fall into that trap with a dedicated cataloging application. But accomplishing as much as you did with file names takes a small fraction of the work, and that’s the important thing.
Don’t touch Picasa with a ten foot pole. I just tried v2.7, and it still has the same horrid behavior it had when I attempted to use it in 2005. What did I do? I indexed a folder on my USB flash drive. Then I closed it, removed the drive, and started it again. What happens? All the photos disappear. Oh wow, Picasa. You’re so smart. Not. They reappear with my captions when I plug the drive back in (as long as it has the same drive letter). But Picasa shouldn’t pretend to be a photo management solution, with captioning and descriptions, if it’s all smoke and mirrors. And it is. Read this: Dear Google: Picasa Needs Improvements, particularly the “Database Export/Import” section. Picasa makes it really hard to move the keywords and descriptions you’ve assigned between computers. Some settings are strewn through the file system in “picasa.ini” files, others are in a proprietary database, which is dumb and sloppy. They should all be in the database, and the database should be easy to transfer, backup, and export to other formats, if Picasa wants to be a real cataloging application. But it’s not, and if you use it, don’t treat it as such. Oh, and the keywording interface is awful.
Abandon the old and start with your new abstract file-names immediately, even if you haven’t thought up how to catalog your work. With 2000 photos, it’s not too hard to find them by thumbnail, and you’ll have more time to shoot when you end the tedious process of assigning descriptive file names. If you use Picasa, don’t touch the functions for keywords or captions. I don’t even recommend the program for browsing; FastStone Image Viewer is simple, free, doesn’t pretend to solve digital asset management, loads thumbnails quickly, has a great slideshow mode, does batch converting and file renaming well, and can be run from a flash drive.
Always, when you’re cataloging your photos, catalog what you will search for. I do this with the photos in my gallery; you can see a list of tags below each one, and they link to similar photos. There aren’t many tags. Just simple stuff like flowers, raindrops, dark, bright, shallow dof, etc. See, if I wanted to be thorough, I could record where each photo was taken, add the hour, year, aperture, etc., each as a tag, use scientific classification for plants and animals, and other terrible stuff. Newbies to cataloging get caught in this trap. It ain’t worth it—you’ll never need it. And if you do need it once in a blue moon, it’s still a waste of time. The time to reward ratio just doesn’t match up at all. It’s all pain and no gain.
Don’t be too dedicated to tagging your photos, whatever method you choose. I follow all the stuff I recommend for file names here, which is done automatically with Downloader Pro, but I haven’t cataloged anything in six months, despite having my abstract database. It’s just not needed when I only use 4% of my photos for my website or exhibition; I can keep track of those fine, just browsing by thumbnails. I’d rather be out shooting.
